Difference between revisions of "Anvil"
EERussianguy (talk | contribs) |
m |
||
| (24 intermediate revisions by 5 users not shown) | |||
| Line 1: | Line 1: | ||
| − | {{ | + | {{SideInfoBox Object |
|title=Anvil | |title=Anvil | ||
|animate=yes | |animate=yes | ||
| − | | | + | |largeimage1={{BlockImage|Stone anvil rhyolite}} {{BlockImage|Copper Anvil}} {{BlockImage|Bronze Anvil}} {{BlockImage|Bismuth Bronze Anvil}} {{BlockImage|Black Bronze Anvil}} {{BlockImage|Wrought Iron Anvil}} {{BlockImage|Steel Anvil}} {{BlockImage|Black Steel Anvil}} {{BlockImage|Blue Steel Anvil}} {{BlockImage|Red Steel Anvil}} |
| − | | | + | |invimage1=Stone anvil rhyolite |
|invimage2=Copper Anvil | |invimage2=Copper Anvil | ||
|invimage3=Bronze Anvil | |invimage3=Bronze Anvil | ||
| Line 15: | Line 15: | ||
|gravity= No | |gravity= No | ||
|tool= Pickaxe | |tool= Pickaxe | ||
| − | |stackable= | + | |stackable= No |
| − | |size= | + | |size= Huge |
| − | |weight= | + | |weight= Very Heavy |
| − | |blockid= | + | |blockid=tfc:metal/anvil |
| − | }} | + | |invimage1=|stacksize=1|renewable=No|oredict=anvil|drops=Self|flammable=|luminance=|blastresistance=}}''For how to use the Anvil, see the [[Metalworking Guide]].''{{ToDo|turn usage chart into a template}} |
| − | {{ToDo| | + | Anvils are one of the main measures of progression: Anvils enable metalworking, allowing for the creation of tools without [[Casting]], and the production of [[Double Ingot|Double Ingots]], [[Sheets]] and [[Double Sheets]], used in [[Armor]], among other things. Anvils are required to produce [[Tools]] more advanced than [[Copper]] or [[Bronze]]. Smithed Tools benefit from from the [[Skills|Smithing Skill]], while Cast Tools do not. Anvils enable the production of tools at the anvils [[Anvil#Obtaining|Metal Tier]] or lower, and the welding of [[Ingot|Ingots]] one tier higher. |
| − | Anvils are | + | |
| + | There are 10 anvils total, one stone and 9 metal. Carrying more than one anvil at a time will inflict a slowness debuff. | ||
=Obtaining= | =Obtaining= | ||
| − | Your very first anvil will be made of [[Stone]]. {{Key| | + | Your very first anvil will be made of [[Stone]]. {{Key|rmb}} on raw [[Raw Stone#Categories|igneous]] rock with a [[hammer]] to instantly create an anvil. |
| + | |||
| + | {{IgneousRock}} | ||
| + | |||
| + | All the [[Metals|Metal]] anvils are made from seven [[Double Ingot|Double Ingots]] in an 'I' pattern. | ||
{{Template:AnvilTiersTable}} | {{Template:AnvilTiersTable}} | ||
| + | |||
=Use= | =Use= | ||
| − | + | ''See also: [[Metalworking Guide]]'' | |
| + | |||
| + | Anvils can be used to make Tools, Armors and Weapons out of the various metals and [[Alloys]] in the game. All tools, except the Shears, take 1 ingot each to create. | ||
| + | |||
| + | Two ingots can be welded together to create a double ingot, used in the creation of Swords, Maces, or a Sheet. Two Sheets can be welded together to create a double sheet, which is used alongside the single metal Sheet to create Armor. | ||
| + | |||
| + | Double sheets are also used in the creation of the [[Bloomery]] and the [[Blast Furnace]]. | ||
| + | |||
| + | ==Welding== | ||
| + | Double Ingots, Double sheets, Armors, and Shears require welding to finish their creation. To weld the component pieces must be heated up to the point where they display the "can weld" tooltip, then they must be placed in the left hand side of the anvil. [[Flux]] must be placed in the right. Outside of the anvil interface, shift-right-click on the anvil while holding a [[hammer]] to weld the two items together. | ||
| + | |||
| + | ==Smithing== | ||
| + | [[File:Anvil GUI.png|thumb|The Anvil GUI]] | ||
| + | |||
| + | ===Parts of the GUI=== | ||
| + | |||
| + | #Secondary item slot. Place an item here to weld it to the item in the main working slot | ||
| + | #Main working slot. Place what you want to work here | ||
| + | #Hammer slot. This is where the hammer goes. Note that to weld, the hammer must be in your hand. When smithing, the hammer may be in the hammer slot in the anvil or may be in your hand when you initially open the anvil; the latter may be more convenient if doing a combination of welding and smithing. | ||
| + | #Flux slot. Needed for welding | ||
| + | #Red actions, moves the green arrow to the left. | ||
| + | #Green actions, moves the green arrow to the right. | ||
| + | #Working arrows. The objective is to make these line up. | ||
| + | #Instructions. These tell you how to work the metal | ||
| + | #Plans. Click here and select what you would like to make. | ||
| + | |||
| + | ===Smithing=== | ||
| + | The objective of anvil work is to make the green arrow and the red arrow line up. When a metal item is hot enough where it says "Can Work", place it in the main working slot. You'll see the Red arrow jump somewhere into the middle of the bottom bar. | ||
| + | |||
| + | *''Red Actions'' move the green arrow leftward. The smallest red action is the light hit, and the largest is the draw. | ||
| + | |||
| + | *''Green Actions'' move the green arrow rightward. The smallest green action is the punch, and the largest is the shrink. | ||
| + | *If the green arrow moves off the screen, the metal will be destroyed. | ||
| + | |||
| + | Beyond lining up the arrows, you must also follow the rules in order to smith the item you want. The last three actions you take must be the ones specified by the instructions at the top. This can be quite difficult to master! | ||
| + | <br /> | ||
Latest revision as of 17:33, 4 November 2021
| Tool | |
| Stacksize |
1 |
| Size ⇲ |
Huge |
| Weight ⚖ |
Very Heavy |
| Renewable |
No |
| Ore Dictionary |
anvil |
| Gravity |
No |
| Drops |
Self |
| Extra Item Data |
See Data |
For how to use the Anvil, see the Metalworking Guide.
| ToDo: Something is missing! Help fill out the following missing information:
turn usage chart into a template
|
Anvils are one of the main measures of progression: Anvils enable metalworking, allowing for the creation of tools without Casting, and the production of Double Ingots, Sheets and Double Sheets, used in Armor, among other things. Anvils are required to produce Tools more advanced than Copper or Bronze. Smithed Tools benefit from from the Smithing Skill, while Cast Tools do not. Anvils enable the production of tools at the anvils Metal Tier or lower, and the welding of Ingots one tier higher.
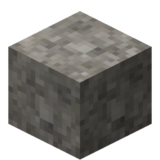
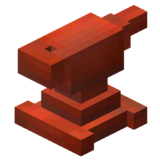
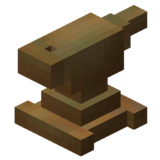
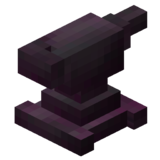
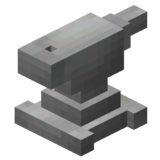
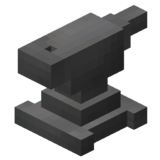
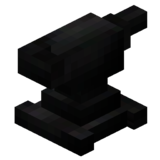
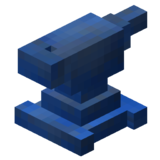
There are 10 anvils total, one stone and 9 metal. Carrying more than one anvil at a time will inflict a slowness debuff.
Obtaining
Your very first anvil will be made of Stone. ![]() Right Click on raw igneous rock with a hammer to instantly create an anvil.
Right Click on raw igneous rock with a hammer to instantly create an anvil.
| Igneous Rock Types | ||||
|---|---|---|---|---|
| Igneous Intrusive | ||||
| Igneous Extrusive | ||||
All the Metal anvils are made from seven Double Ingots in an 'I' pattern.
| Tier | Anvil |
|---|---|
| 0 | |
| 1 | |
| 2 | |
| 3 | |
| 4 | |
| 5 | |
| 6 | |
Use
See also: Metalworking Guide
Anvils can be used to make Tools, Armors and Weapons out of the various metals and Alloys in the game. All tools, except the Shears, take 1 ingot each to create.
Two ingots can be welded together to create a double ingot, used in the creation of Swords, Maces, or a Sheet. Two Sheets can be welded together to create a double sheet, which is used alongside the single metal Sheet to create Armor.
Double sheets are also used in the creation of the Bloomery and the Blast Furnace.
Welding
Double Ingots, Double sheets, Armors, and Shears require welding to finish their creation. To weld the component pieces must be heated up to the point where they display the "can weld" tooltip, then they must be placed in the left hand side of the anvil. Flux must be placed in the right. Outside of the anvil interface, shift-right-click on the anvil while holding a hammer to weld the two items together.
Smithing
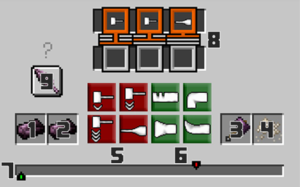
Parts of the GUI
- Secondary item slot. Place an item here to weld it to the item in the main working slot
- Main working slot. Place what you want to work here
- Hammer slot. This is where the hammer goes. Note that to weld, the hammer must be in your hand. When smithing, the hammer may be in the hammer slot in the anvil or may be in your hand when you initially open the anvil; the latter may be more convenient if doing a combination of welding and smithing.
- Flux slot. Needed for welding
- Red actions, moves the green arrow to the left.
- Green actions, moves the green arrow to the right.
- Working arrows. The objective is to make these line up.
- Instructions. These tell you how to work the metal
- Plans. Click here and select what you would like to make.
Smithing
The objective of anvil work is to make the green arrow and the red arrow line up. When a metal item is hot enough where it says "Can Work", place it in the main working slot. You'll see the Red arrow jump somewhere into the middle of the bottom bar.
- Red Actions move the green arrow leftward. The smallest red action is the light hit, and the largest is the draw.
- Green Actions move the green arrow rightward. The smallest green action is the punch, and the largest is the shrink.
- If the green arrow moves off the screen, the metal will be destroyed.
Beyond lining up the arrows, you must also follow the rules in order to smith the item you want. The last three actions you take must be the ones specified by the instructions at the top. This can be quite difficult to master!
