|
|
| (11 intermediate revisions by 2 users not shown) |
| Line 1: |
Line 1: |
| − | {{Item | + | {{SideInfoBox Object |
| − | |title= Chisel | + | | title = Chisel |
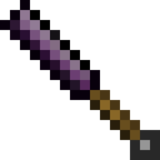
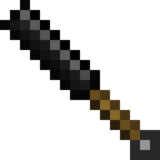
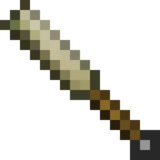
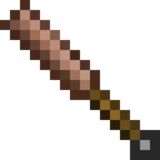
| − | |image= Copper Chisel.png; Bismuth Bronze Chisel.png; Black Bronze Chisel.png; Bronze Chisel.png; Wrought Iron Chisel.png; Steel Chisel.png; Black Steel Chisel.png; Blue Steel Chisel.png; Red Steel Chisel.png | + | | largeimage1 = {{BlockImage|Bismuth Bronze Chisel}} {{BlockImage|Black Bronze Chisel}} {{BlockImage|Black Steel Chisel}} {{BlockImage|Blue Steel Chisel}} {{BlockImage|Bronze Chisel}} {{BlockImage|Copper Chisel}} |
| − | |invimage= Copper Chisel | + | {{BlockImage|Red Steel Chisel}} {{BlockImage|Steel Chisel}} {{BlockImage|Wrought Iron Chisel}} |
| − | |invimage2= Bismuth Bronze Chisel | + | | invimage1 = Bismuth Bronze Chisel |
| − | |invimage3= Black Bronze Chisel | + | | tool = |
| − | |invimage4= Bronze Chisel | + | | stacksize = 1 |
| − | |invimage5= Wrought Iron Chisel | + | | size = Large |
| − | |invimage6= Steel Chisel | + | | weight = Medium |
| − | |invimage7= Black Steel Chisel | + | | renewable = No |
| − | |invimage8= Blue Steel Chisel | + | | oredict = chisel, damageTypeSlashing |
| − | |invimage9= Red Steel Chisel | + | | gravity = |
| − | |stackable= No | + | | drops = N/A |
| − | |size= Very Small | + | | flammable = |
| − | |weight= Medium | + | | luminance = |
| − | |itemid= 16483, 16484, 16486 - 16491, 16493 | + | | blastresistance = |
| − | |notes= Used in combination with a [[Hammer]]. | + | | invimage3 = Black Bronze Chisel |
| | + | | invimage4 = Black Steel Chisel |
| | + | | invimage5 = Blue Steel Chisel |
| | + | | invimage7 = Bronze Chisel |
| | + | | invimage8 = Copper Chisel |
| | + | | invimage15 = Red Steel Chisel |
| | + | | invimage18 = Steel Chisel |
| | + | | invimage21 = Wrought Iron Chisel |
| | }} | | }} |
| | | | |
| − | == Obtaining ==
| + | The Chisel is a tool used to detail blocks. It can be Cast or [[Anvil|Smithed]] from 100 units of metal. The Chisel requires a [[Hammer]] in the offhand to be operated. The Chisel has 3 modes, Polishing, Stair, and Slab. To switch modes, press {{Key|M}}. To use the Chisel, just use {{Key|rmb}}. |
| | | | |
| − | === Metal Chisel === | + | ==Polishing Mode== |
| | + | [[File:Chiseling Smooth.png|thumb|Chiseling Raw blocks into Smooth ones.]] |
| | + | The Polishing Mode converts [[Raw Stone]] into [[Smooth Stone]]. Smooth Stone created from the Chisel is able to [[Gravity|collapse]] unless it has been placed by the player. |
| | | | |
| − | Metal Chisels can only be made from [[Metals#Tool Metals|tool metals]]. They can be cast in ceramic molds, or worked on a metal anvil.
| + | ==Stair Mode== |
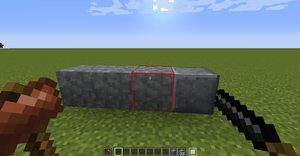
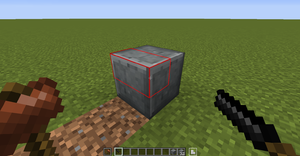
| | + | [[File:Chiseling Stairs.png|thumb|Chiseling Stairs out of a Smooth block.]] |
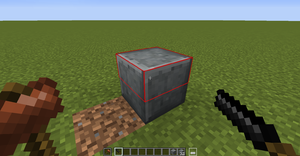
| | + | Stair Mode allows the player to convert blocks into Stairs. Holding the Chisel in Stair Mode shows a red outline around a part of the block. Right click to break off the outlined portion. |
| | | | |
| − | ==== Casting ====
| + | ''Note: Stair mode creates actual stair blocks, which will automatically connect to other stairs based on orientation. These stair blocks can be picked up and moved as if you had crafted them outright.'' |
| | | | |
| − | {{main|Metalworking Industry#Casting|Casting}}
| + | ==Slab Mode== |
| − | [[Bismuth Bronze]], [[Black Bronze]], [[Bronze]], and [[Copper]] Chisels can be cast using a [[Vessel]] or a [[Ceramic Mold]] instead of working on an anvil.
| + | [[File:Chiseling Slabs.png|thumb|Chiseling Slabs out of a Smooth block.]] |
| − | | + | Slab Mode works much like Stair Mode, except it allows you to create convert a full block into a slab. The slab will drop from the block when you chisel it. |
| − | ===== Ceramic Mold =====
| |
| − | | |
| − | {| cellspacing="10"
| |
| − | !Making the Clay Tool Mold
| |
| − | !Firing the Mold
| |
| − | |-
| |
| − | |{{Grid/Knapping
| |
| − | |A1= CFL|B1= CFL|C1= CFD|D1= CFL |E1= CFL
| |
| − | |A2= CFL|B2= CFL|C2= CFD|D2= CFL |E2= CFL
| |
| − | |A3= CFL|B3= CFL|C3= CFD|D3= CFL |E3= CFL
| |
| − | |A4= CFL|B4= CFL|C4= CFD|D4= CFL |E4= CFL
| |
| − | |A5= CFL|B5= CFL|C5= CFD|D5= CFL |E5= CFL
| |
| − | |Output= Clay Mold Chisel
| |
| − | }}
| |
| − | |{{Grid/Pit Kiln
| |
| − | |A1= Clay Mold Chisel
| |
| − | |Output= Ceramic Mold Chisel
| |
| − | }}
| |
| − | |}
| |
| − | | |
| − | ===== Vessel =====
| |
| − | | |
| − | Place an empty or partially filled Chisel mold into the slot to fill it with metal from the vessel. It takes 100 units of metal to completely fill an empty Ceramic Mold. The text in the vessel's GUI will be updated to show the amount of metal remaining in the vessel.
| |
| − | | |
| − | {{Grid/Vessel
| |
| − | |Units=100
| |
| − | |A1= Ceramic Mold Chisel; Ceramic Mold Chisel (Copper)
| |
| − | }}
| |
| − | | |
| − | ===== Unshaped Ingot =====
| |
| − | | |
| − | To fill the Chisel mold from a ceramic ingot mold, right click the ''liquid'' unshaped ingot to open the casting interface:
| |
| − | {| cellspacing="10"
| |
| − | |{{Grid/Ceramic Mold
| |
| − | |A1= Unshaped Copper;; Unshaped Bismuth Bronze;; Unshaped Black Bronze;; Unshaped Bronze; |A2= Ceramic Mold Chisel; Ceramic Mold
| |
| − | |Output= ; Ceramic Mold Chisel (Copper);; Ceramic Mold Chisel (Bismuth Bronze);; Ceramic Mold Chisel (Black Bronze);; Ceramic Mold Chisel (Bronze)
| |
| − | }}
| |
| − | |}
| |
| − | Put the ceramic Chisel mold in the second input slot and wait for the filled mold to finished.
| |
| − | | |
| − | {| cellspacing="10"
| |
| − | !Removing the Head from the Mold
| |
| − | !Finishing the Chisel
| |
| − | |-
| |
| − | |{{Grid/Inventory Table
| |
| − | |A2= |B2= Ceramic Mold Chisel (Copper); Ceramic Mold Chisel (Bismuth Bronze); Ceramic Mold Chisel (Black Bronze); Ceramic Mold Chisel (Bronze)
| |
| − | |Output= Chisel Head (Copper); Chisel Head (Bismuth Bronze); Chisel Head (Black Bronze); Chisel Head (Bronze)
| |
| − | }}
| |
| − | |{{Grid/Inventory Table
| |
| − | |A1= |B1= Chisel Head (Copper); Chisel Head (Bismuth Bronze); Chisel Head (Black Bronze); Chisel Head (Bronze)
| |
| − | |A2= |B2= Stick
| |
| − | |Output= Copper Chisel; Bismuth Bronze Chisel; Black Bronze Chisel; Bronze Chisel
| |
| − | }}
| |
| − | |}
| |
| − | | |
| − | ==== Smithing ====
| |
| − | | |
| − | {{main|Anvil#Working|Working}}
| |
| − | Chisel Heads can also be crafted by using ingots on an [[anvil]] with a [[hammer]]. This is the only option for higher tier metals that cannot be cast. The durability depends both on the metal used and the skill of the smith forging the tool.
| |
| − | | |
| − | ===== Smithing the Chisel Head =====
| |
| − | | |
| − | {|class="wikitable" style="text-align:center;"
| |
| − | !colspan=3| [[Anvil#Rules|Working Rules]]
| |
| − | |-
| |
| − | |[[File: Grid Anvil Hit Light.png]] [[File: Grid Anvil Hit Medium.png]] [[File: Grid Anvil Hit Heavy.png]]
| |
| − | |[[File: Grid Anvil Hit Light.png]] [[File: Grid Anvil Hit Medium.png]] [[File: Grid Anvil Hit Heavy.png]] | |
| − | |[[File: Grid Anvil Draw.png]] | |
| − | |-
| |
| − | |Hit, Last
| |
| − | |Hit, Not Last
| |
| − | |Draw, Not Last
| |
| − | |}
| |
| − | | |
| − | {{Grid/Anvil
| |
| − | |A1=Steel Ingot; |B1= ; Chisel Head (Steel) |C1= Chisel Head (Steel)
| |
| − | |Tool= Stone Hammer
| |
| − | }}
| |
| − | | |
| − | ===== Finishing the Chisel =====
| |
| − | | |
| − | {{Grid/Inventory Table
| |
| − | |A1= |B1= Chisel Head (Steel)
| |
| − | |A2= |B2= Stick
| |
| − | |Output= Steel Chisel
| |
| − | }}
| |
| − | | |
| − | == Usage ==
| |
| − | | |
| − | Chisels are used to shape [[Stone|Raw Stone]], [[Cobblestone]], [[Smooth Stone]] and [[Planks|Plank Blocks]] into a variety of shapes and forms, as well as turn [[rocks]] into bricks.
| |
| − | | |
| − | === Bricks ===
| |
| − | | |
| − | {{Grid/Inventory Table
| |
| − | |shapeless=1
| |
| − | |A1= |B1=|C1=
| |
| − | |A2= Steel Chisel |B2= Rock
| |
| − | |A3= |B3= |C3=
| |
| − | |Output= Granite Brick
| |
| − | }}
| |
| − | | |
| − | These bricks can be used along with [[mortar]] to craft [[Construction#Brick_Blocks|brick blocks]] and [[Construction#Walls|brick walls]].
| |
| − | | |
| − | === Chisel Modes ===
| |
| − | | |
| − | In order to use a chisel on blocks in the world, the player must also have a [[Hammer]] equipped in their hotbar. The mode of the chisel can be changed by pressing the Cycle Tool Mode key (Default:{{key|M}}), while having the chisel equipped.
| |
| − | | |
| − | [[File:Chisel Mode Toolbar.png|link=]] < Mode Indicator
| |
| − | | |
| − | ;<h4>[[File:Toolmode_2-1.png|link=]] Smoothing Mode</h4>: Turns [[Stone|Raw Stone]] into [[Smooth Stone]]; does nothing to other blocks.
| |
| − | | |
| − | ;<h4>[[File:Toolmode_2-2.png|link=]] Stair Mode</h4>: Turns the targeted block into a stair block. Creating upside-down stairs is done by targeting the bottom face of a block. Stairs created in this way do not drop when mined, and must be created on the spot. Cannot make corner stairs.
| |
| − | | |
| − | ;<h4>[[File:Toolmode_2-3.png|link=]] Slab Mode</h4>: Slabs the targeted face of a block. Each face may be slabbed a maximum of seven times, with each use of the chisel removing another eighth of the original block. Any face of the block may be slabbed at any time, meaning it is possible to create blocks of almost any size and position. Slabs created in this way do not drop when mined, and must be created on the spot. Slabs do not connect to fences or glass panes, and grass will grow under slabs of any size.
| |
| − | | |
| − | ;<h4>[[File:Toolmode_2-4.png|link=]] Detail Mode</h4>: Turns the targeted block into an 8×8×8 block consisting of 512 sub-blocks that can be chiseled away individually to have highly detailed work. Pressing the Lock Tool Location key (Default:{{key|L}}) locks the chisel to the last block which was detailed, making it easier to detail one block at a time. Pressing it again will unlock the chisel and allow it to detail other blocks. Detail mode is also required to use Blueprints.
| |
| − | | |
| − | ===== Blueprints =====
| |
| − | | |
| − | Blueprints allow the player to make one detailed block structure and copy it onto a blueprint, in order to easily create it again. Right-clicking with a blank blueprint on a detailed block will copy that detailed block onto each blueprint in the stack of blueprints. '''This will copy the block layout to every single blueprint item in the stack.'''
| |
| − | | |
| − | When this is done, a GUI will open to name the blueprint for organization purposes. To use the blueprint, both a chisel and a hammer must be equipped in the hotbar. Right click on the block with a chisel in detailed mode to convert it into the subdivided block, then click on the block with the blueprint. Both the chisel and the hammer will take durability damage.
| |
| − | | |
| − | To make a blueprint, simply combine one [[mcwiki:Paper|Paper]] and one [[Marking]] together in the crafting table.
| |
| − | | |
| − | {{Grid/Inventory Table
| |
| − | |shapeless=1
| |
| − | |A1= Marking |B1= Paper
| |
| − | |Output= Blueprint
| |
| − | }}
| |
| − | | |
| − | == Achievements ==
| |
| − | | |
| − | {{main|Achievements}}
| |
| − | | |
| − | {| class="wikitable"
| |
| − | |-
| |
| − | ! Icon
| |
| − | ! Achievement
| |
| − | ! In-game description
| |
| − | ! Prerequisites
| |
| − | ! Actual requirements (if different)
| |
| − | |-
| |
| − | | {{Achievement|Axe Head (Copper)}}
| |
| − | ! Chalcolithic!
| |
| − | | Cast something in metal to enter the Copper Age
| |
| − | | No stone unturned
| |
| − | | Fill a tool mold in a ceramic vessel filled with liquid metal.
| |
| − | |}
| |
![]() Right Click.
Right Click.
